Comprehensive Guide to Metal Stamping Mold Assembly
Introduction
Metal stamping molds are essential in manufacturing industries, enabling precise and efficient production of metal components. The mold assembly process plays a critical role in ensuring the quality, durability, and accuracy of stamped parts.
In this article, we will walk you through the complete metal stamping mold assembly process, covering essential steps, best practices, and quality control measures. Whether you are a mold engineer, manufacturer, or industry professional, this guide will provide valuable insights into achieving high-performance stamping molds.
I. Pre-Assembly Preparation
Before starting the assembly process, it is crucial to prepare the necessary tools, measuring instruments, and reference documents to ensure smooth execution.
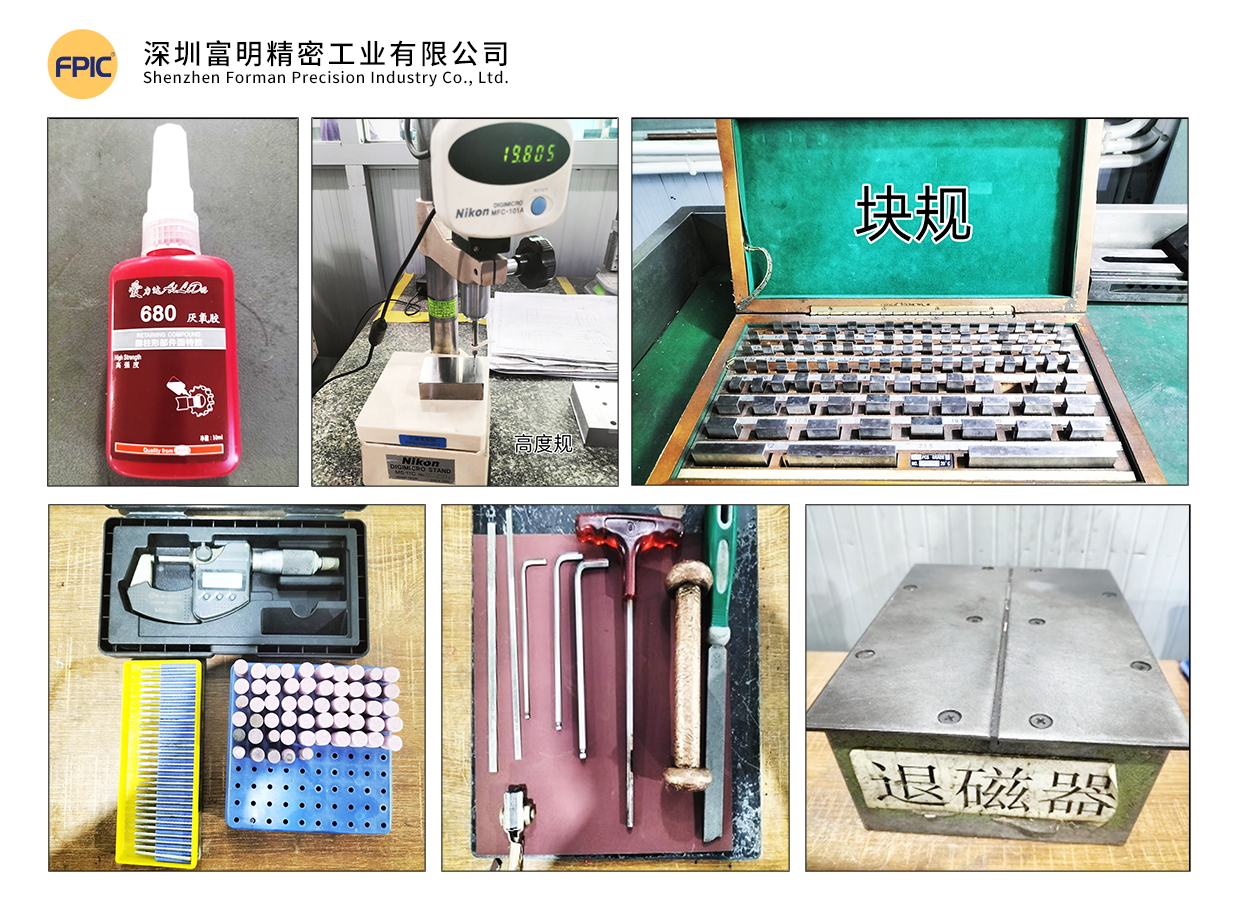
1. Tools & Measuring Instruments
Ensure that the required tools and measuring instruments are available, including:
- Hand tools: Wrenches, files, copper hammers
- Surface finishing tools: Oil stones, sandpaper, pneumatic grinders, polishing heads
- Cleaning agents: Mold cleaner
- Adhesives & lubricants: 680 glue
- Measuring instruments: Vernier calipers, micrometers, gauge blocks, thin shims, demagnetizer, etc.
2. Understanding the Mold
Before assembly, review all relevant drawings:
- Product drawings
- Layout drawings
- Mold part drawings
3. Mold Assembly Process Overview
Familiarize yourself with the entire mold assembly process:
- Main Plate Gluing (Clamping Plate + Stripper Plate + Bottom Plate)
- Template Assembly
- Clamping Plate Component Assembly
- Stripper Plate Assembly
- Bottom Plate Assembly
- Upper & Lower Mold Matching & Confirmation
- Mold Base Gluing (Upper & Lower Mold Base)
- Installation of Standard Components
- Trial Stamping & Sample Testing
II. Template & Component Inspection Before Assembly
1. Template Inspection
✅ Material & Hardness Verification: Ensure templates have undergone deep-freezing and stabilization treatment.
✅ Flatness & Warping Check: Warping should not exceed 0.005mm per 100mm.
✅ Hole Position & Processing Accuracy: Verify drilled holes, allowances, and surface finish.
✅ Screw Hole Depth & Alignment: Check threaded hole depth and perpendicularity for proper fastener fitment.
✅ Embossing & Pressing Grooves: Ensure correct width and depth.
✅ Labeling & Marking: Verify mold number, material width, pitch, and part name.
2. Component Inspection
- Material, Quantity & Hardness Verification
- Dimensional Accuracy Check
Proper inspection eliminates potential errors that could cause misalignment, improper fits, and structural weaknesses in the final mold.
III. Template Machining & Finishing
1. Mold Base Preparation
- Clean all threaded holes of debris; check for damaged or unthreaded holes.
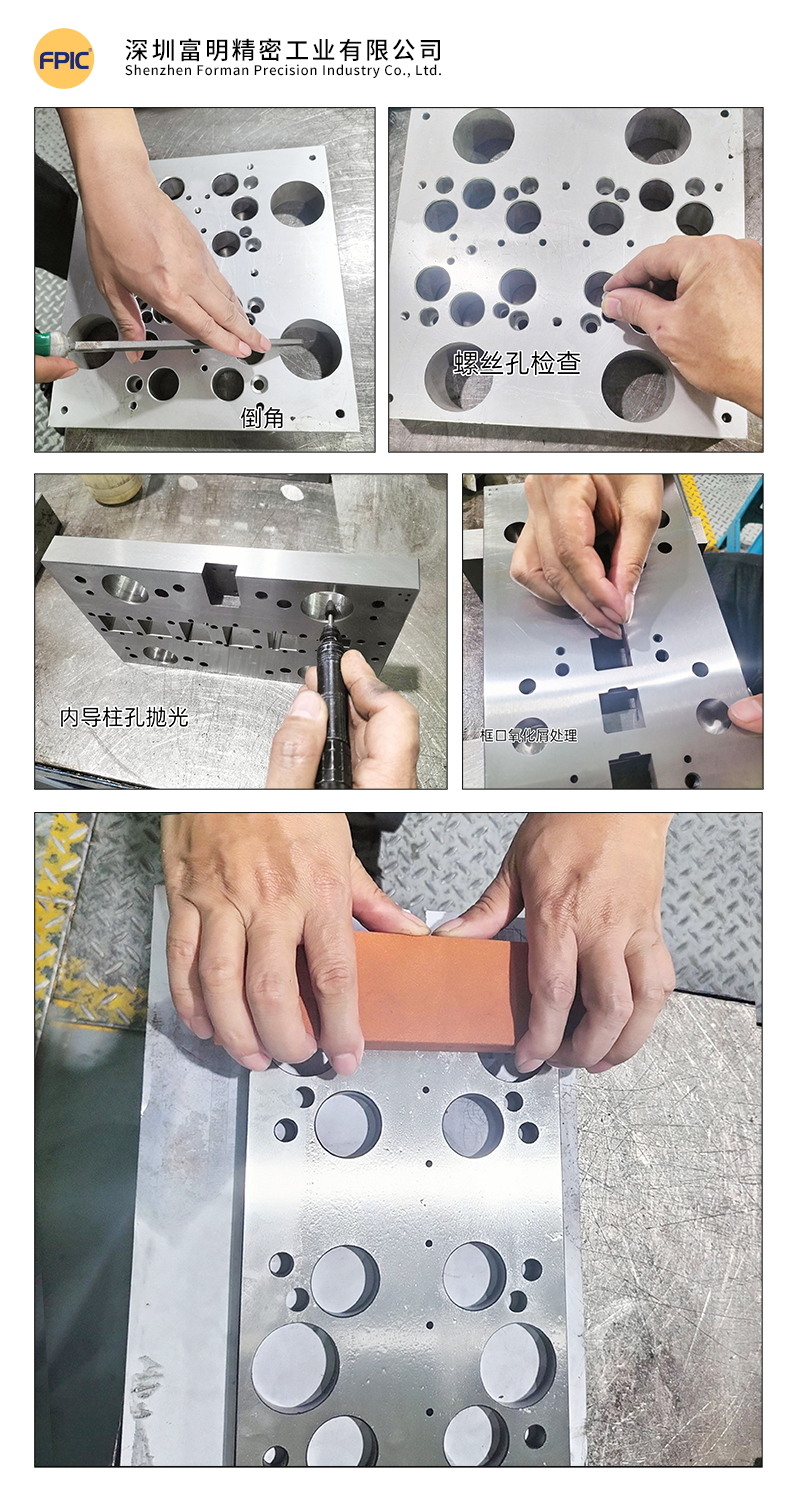
- Deburr sharp edges and corners using a flat file.
- Polish the surface with an oil stone to remove burrs.
2. Hole Deburring & Edge Rounding
- Use round oil stones, files, grinders, and sandpaper for chamfering insert holes, round holes, and square holes.
- Remove oxidation residues from wire-cut holes using fiber oil stones and round rods.
3. Surface Finishing
- Polish the template with fine oil stones in the direction of the grinding pattern.
- Use lubricating oil during polishing to prevent scratches.
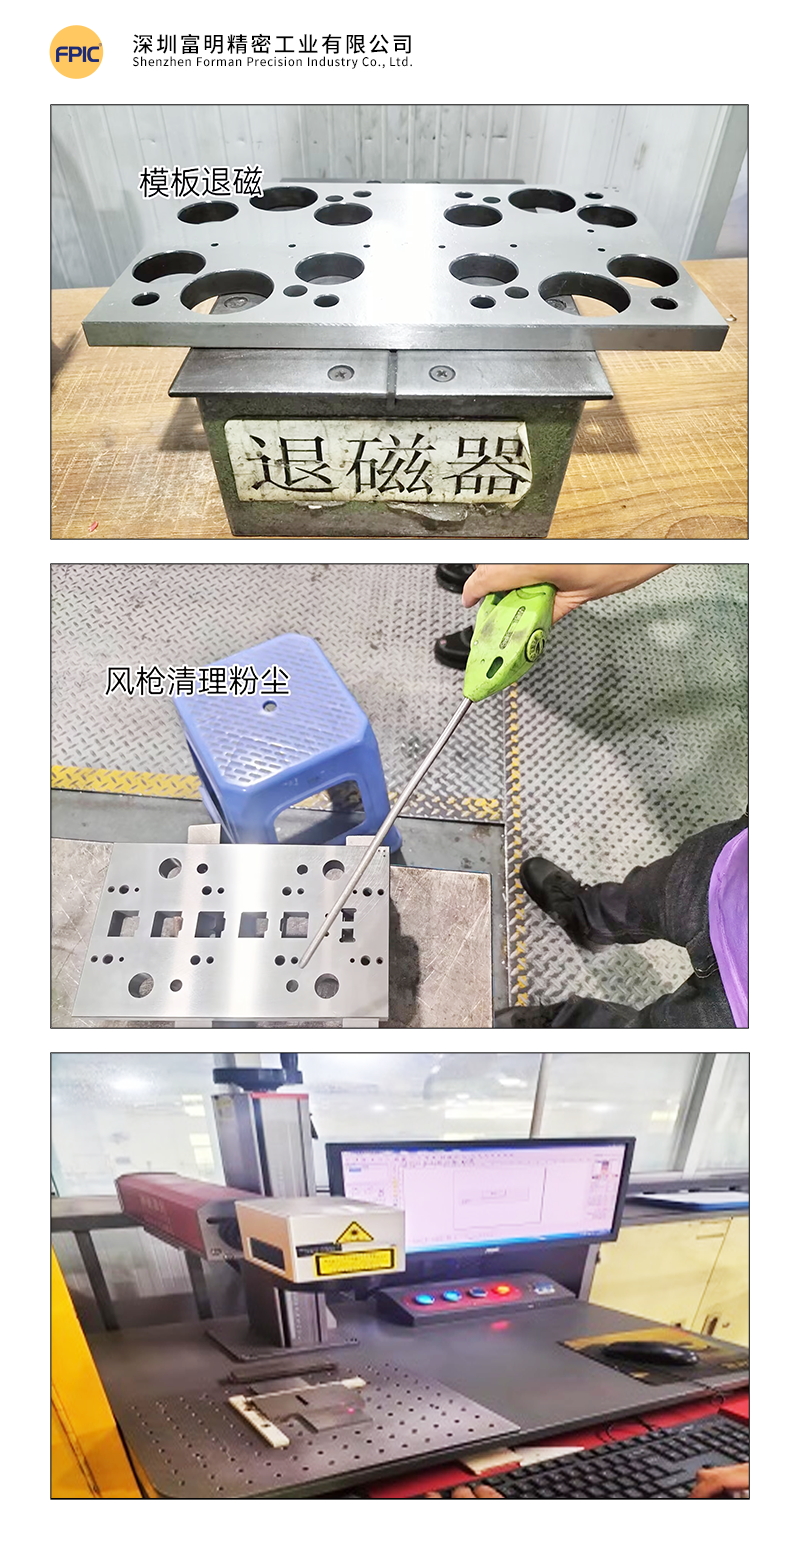
4. Demagnetization
-
Use a demagnetizer to remove magnetism from the mold base and all components to prevent iron powder absorption, which could affect assembly accuracy.
5. Cleaning
- Clean templates thoroughly using mold cleaner and compressed air.
- Precision mold assembly requires a high level of cleanliness to ensure optimal performance.
6. Component Handling
- Engrave part numbers on components.
- Add lead-in angles to guide posts.
- Sort, match, and demagnetize all parts.
Tip: Precision molds require extreme cleanliness to prevent defects in stamped parts.
IV. Measurement & Alignment Verification
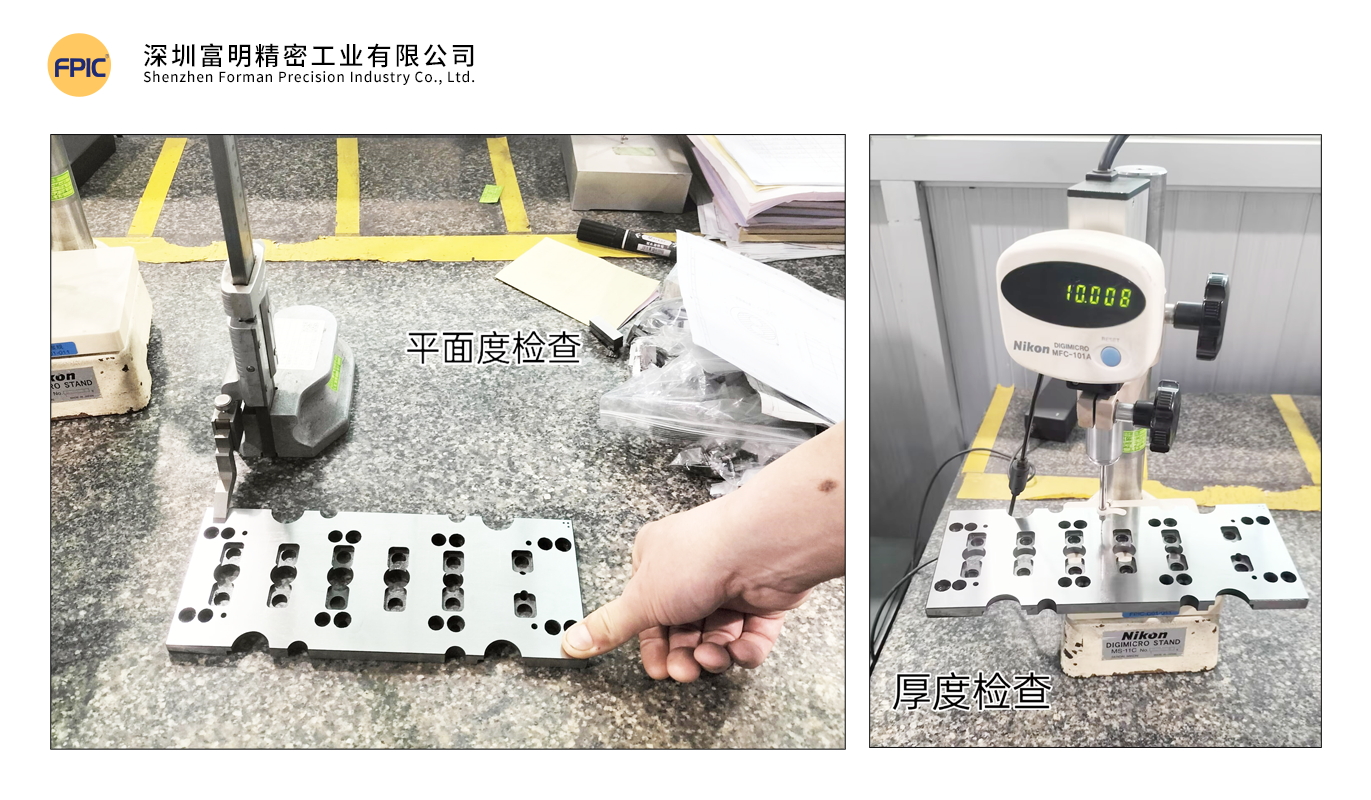
1. Template Parallelism Measurement
- Fix a dial indicator to zero on a reference platform and measure.
- Standard tolerance: ≤ 0.002mm.
2. Template Warping & Deformation Check
- Press one end of the template and observe dial indicator changes at the other end.
- Deformation should not exceed 0.003mm.
3. Main Template Parallelism & Warping Measurement
-
Tolerance should not exceed 0.005mm.
4. Guide Post & Guide Bushing Measurement
- Ensure guide posts conform to the required dimensions and roundness.
- Measure guide post fitment and machining accuracy per the drawings.
V. Mold Gluing Process
1. Gluing Steps
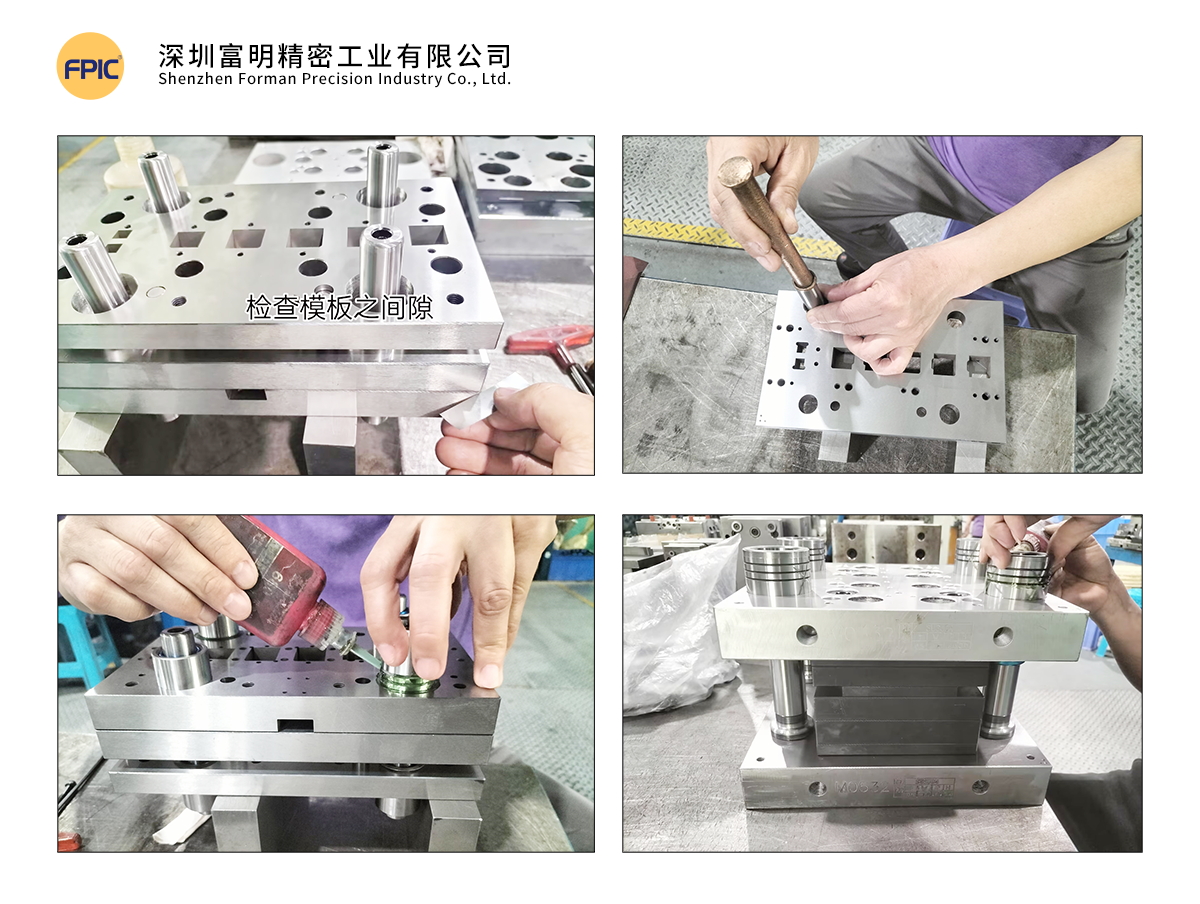
Step 1:
- Use 0.005mm shims to check for gaps after mold closure.
- The mold is qualified when shims cannot enter the gap.
Step 2:
- After confirming the main template, insert a 10mm positioning pin from the clamping plate to the bottom plate to align the three primary templates.
- If any gaps exist, check for debris or interference before proceeding.
Step 3:
- Clean guide post and guide bushing thoroughly.
- Insert guide posts into the stripper plate and secure with screws.
- Place 0.2mm steel shims in each guide bushing hole.
Step 4:
- Apply 680 glue evenly on the guide bushings while rotating them for even distribution.
- Slowly insert guide bushings into the template until they rest against the steel shims.
- Repeat for all guide bushings.
 VI. Standard Component Assembly
1. Standard Component Inspection
-
Verify that all standard parts meet specifications.
2. Height & Position Check
-
Confirm the heights of floating pins, equal-height sleeves, limit posts, guide pins, and ejector rods.
3. Standard Component Installation
- Clean all round holes before inserting components.
- Install components into the mold cavity in order.
4. Final Confirmation
- Ensure all parts are flat and properly fitted.
- Verify free movement of standard components.
- Check for clogged scrap ejection holes.
- Ensure adjustment rods are correctly positioned and do not interfere with other templates.
VII. Mold Testing & Issue Documentation
1. Mold Closure Height Verification
-
Record closure height in the Mold Testing & Issue Report.
2. Manual Mold Closure Test
-
Close the mold manually to check for proper spring compression.
3. Trial Stamping & Sample Testing
- Record initial data for comparison in subsequent trials.
- Repeat trials until samples meet specifications.
4. Issue Analysis & Data Collection
- Document all design & machining issues.
- Analyze the root cause and record corrective actions.
- Collect data for future design optimizations.
Example: Mold Testing & Issue Report
| Date | Issue Description | Corrective Action | Design Issue | Machining Issue | Resolution Date | Result | Responsible Person |
|---|---|---|---|---|---|---|---|
| 2.18 | Tight-fitting D07 forming part | Wire-cut rework | ✔ | 2.18 | Normal | Engineer A | |
| 2.19 | S05 part causing ejection failure | Added ejector structure | ✔ | 2.19 | Normal | Engineer B | |
| 2.19 | Dimension 2.02mm undersized | Added 0.02mm shim | ✔ | 2.19 | Normal | Engineer B | |
| 2.20 | Sent for FAI inspection | 2.20 | QA Inspector |
Note: All mold trials must be fully documented, ensuring a complete history of deviations and corrective actions.
Conclusion
The metal stamping mold assembly process requires precision, attention to detail, and strict quality control to ensure high-performance and long-lasting molds. By following these structured steps—from pre-assembly preparation to final testing—manufacturers can optimize efficiency, reduce downtime, and improve mold longevity.
Implementing these best practices will help ensure high-quality stamped parts, reducing waste, rework, and production costs.
Looking for High-Quality Metal Stamping Solutions?
At FPIC, we specialize in precision mold manufacturing with a focus on quality, efficiency, and innovation. Contact us today to learn more about our custom mold solutions!